First cam set
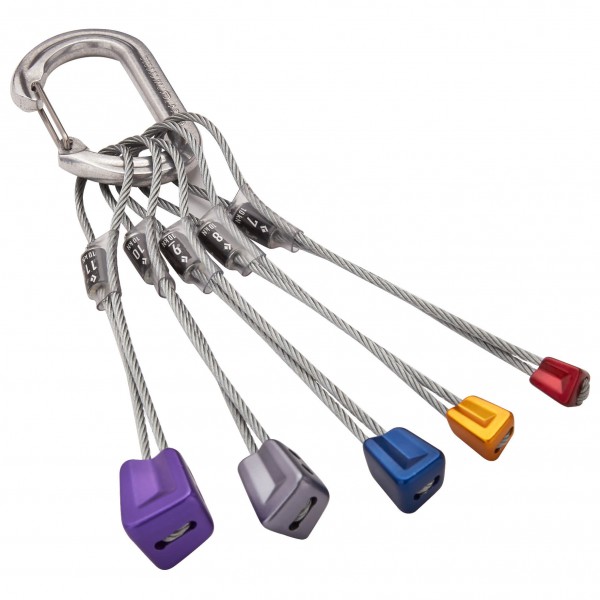
Black Diamond or Wild Country, sizes 0.5–2 — four pieces, double-axle. DMM works too. Then add two sizes down and two up.
What you carry on the harness helps decide how well a line can be protected — and why some routes get R or X.
Start with a compact set, then extend down and up. Don’t buy used cams.
Black Diamond or Wild Country, sizes 0.5–2 — four pieces, double-axle. DMM works too. Then add two sizes down and two up.
Mostly the small sizes — they often sit where normal cams get fiddly. On top, not instead of the first set.
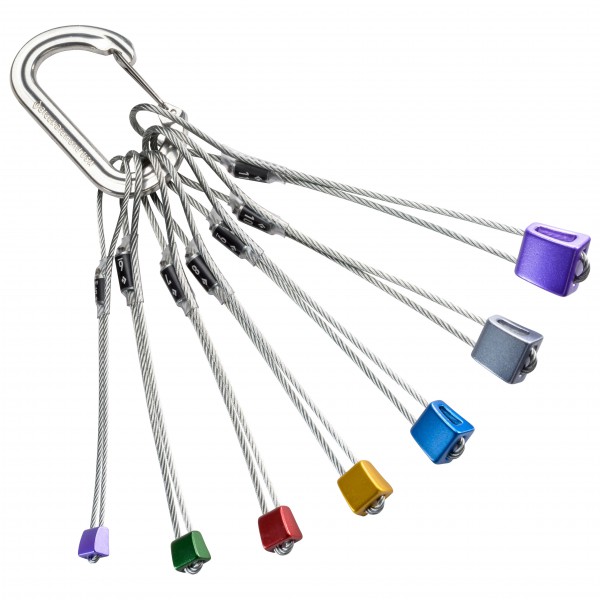
About 7–10, small to large — for V-constrictions where cams won’t seat. On limestone often more useful than a second cam set.
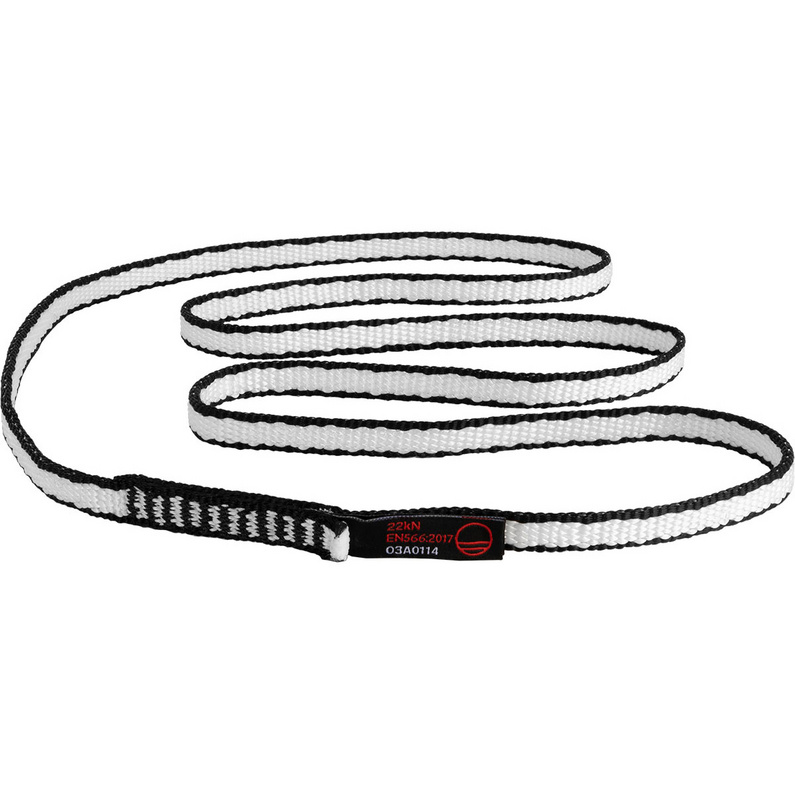
At least 4–6: 60 cm sling + 2 carabiners, folded. For extending and for nuts (less rope movement on the wedge).
Stopper, Wires, Rocks
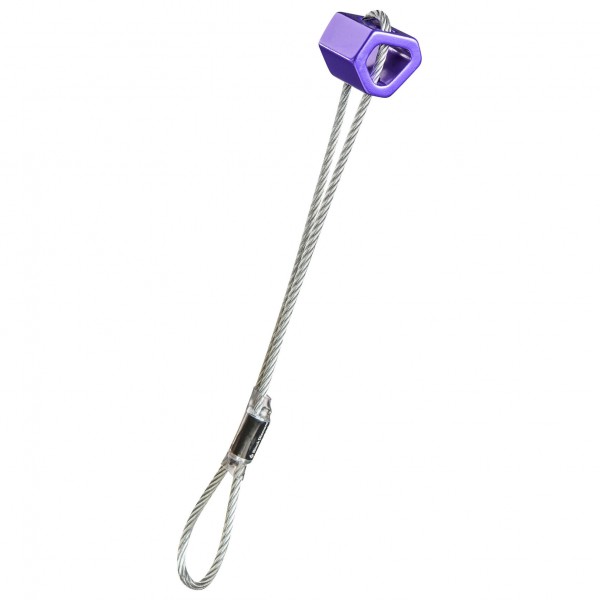
A metal wedge on wire: seat it in a V that pinches downward, set it, downward pull holds it.
Hexentric, hex nut, torque nut
Hex block (wire or sling): several orientations — seats passively in constrictions, sometimes with a bit of torque.
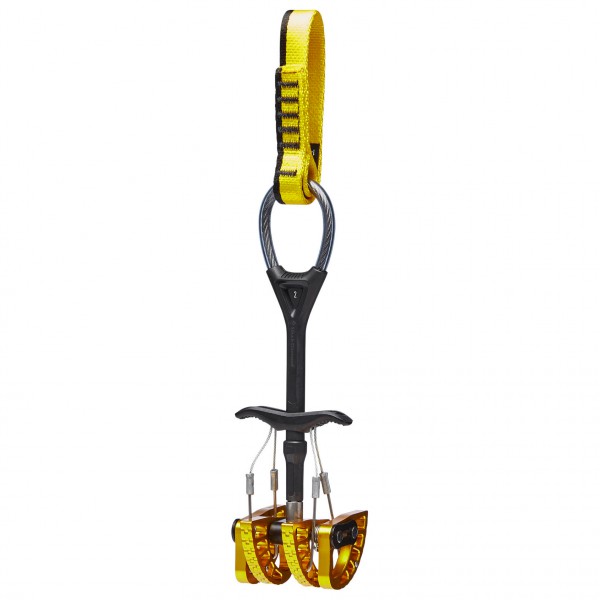
Friends, Camalots, spring-loaded camming device
Spring-loaded lobes: the more pull, the harder they cam into the parallel crack. Trigger to place and remove.
Tri-Cam
Can be set active (like a cam) or passive (like a nut) — especially useful in limestone and holes.
Sling, tape sling, cord
Drape or thread a solid block, horn or thread, clip to the rope. Sling or cord — threads and horns are often the best natural gear.
Offset Stopper, Offset Cam, Micro, Alien
Uneven wedge faces (offset nuts) or specialist cams (offset/micro) — exactly where normal gear finds nothing.
Cams hold by lobe friction in the crack. Best in the middle of the range — neither too open nor crushed. Makers (e.g. Black Diamond) often call about 50–90% retraction the ideal working range.
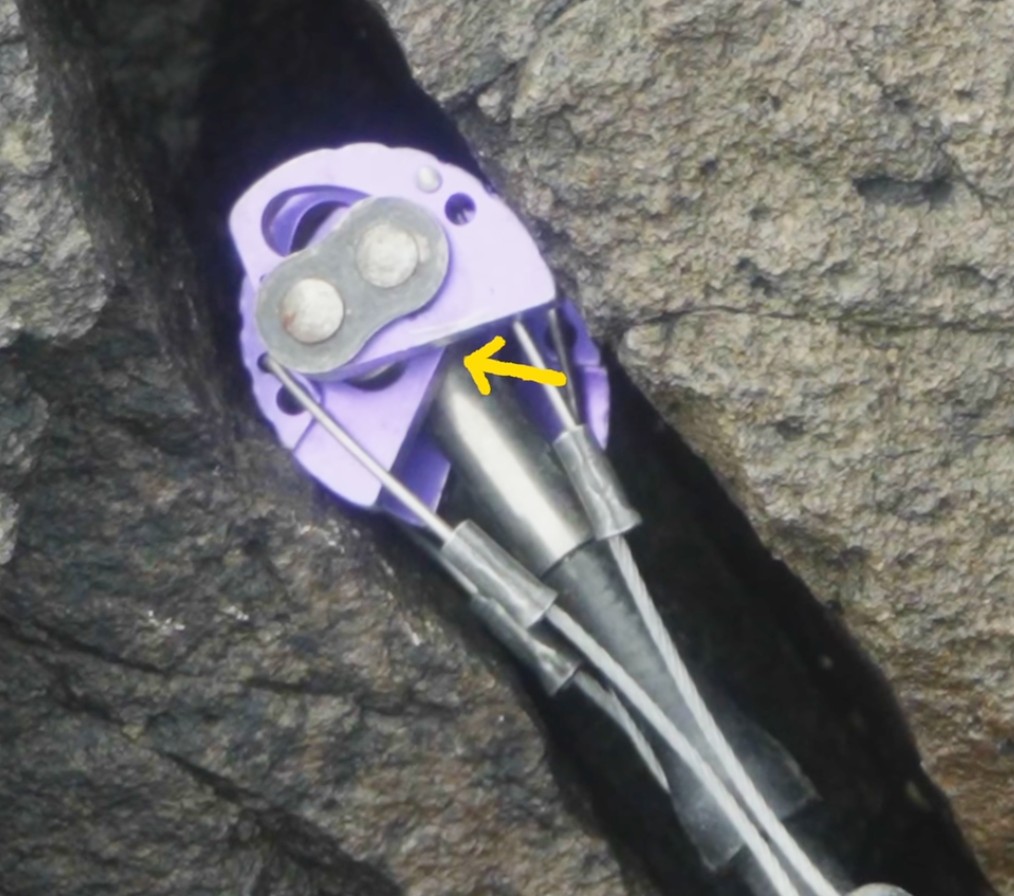
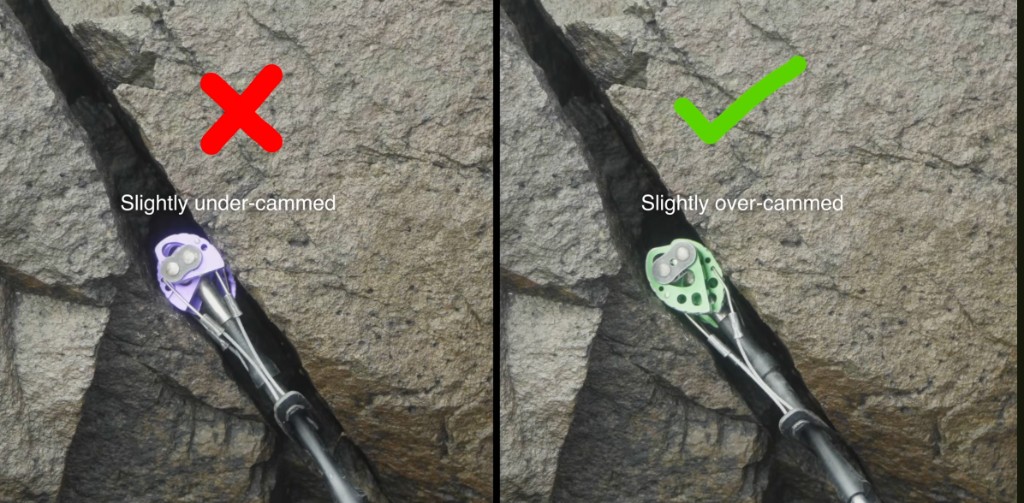
Look at the angle between the straight undersides of opposite lobes (see photo). Clearly over about 90° usually means the cam is too small (too open) — take the next size up. Good is flatter, roughly toward ~60° or below.
Between a bit too open and a bit over-cammed, pick the slightly larger size. Too small can skate in a fall — too big often still holds, it’s just harder to retrieve. Still avoid being fully crushed.
Ideal: about 50–90% retracted. Dead centre is nice — if in doubt, a bit more retracted than too open.
Align the stem with the expected fall. A sideways pull can twist or lever the cam out — especially in horizontals.
All three/four lobes should sit evenly on solid rock — not on brittle crystals, edges, or in holes that only two lobes touch.
Cracks that open up or behind the cam invite walking. Slightly constricting or parallel spots are better. Extend with a draw/sling if needed so the rope tugs the stem less.
Cams press outward — loose, wet or mossy rock holds worse. Tap, look, place only in solid rock.
Good drill on the ground or in the gym: put a hand in the crack/slot and guess the cam size before you grab it. Switching costs time and power — hitting the size first means faster, calmer placing.
Sideways wobble (rope drag, climbing over) walks cams deeper into the crack — then they’re almost stuck. Extend with a draw/alpine draw so the rope tugs the stem less.
The lobes don’t need millimetre-equal opening. Slightly different camming is fine — as long as all sit on solid rock and nothing dances on an edge.
Rotate the cam once around its stem — it often sits better, especially in irregular cracks.
Double-axle cams (Camalot & co.) sit more stably — like a wall plug that expands. Single-axle cams can over-rotate. Buy double-axle, except the tiniest (those may be single-axle).
On granite (and other crystalline rock) lean cams. On limestone more nuts — V-spots and pockets are more common there than clean parallel cracks.
Nuts (stoppers) are passive wedges: they hold because the shape pinches in a V — not because springs cam. Size, contact and always a draw or alpine draw matter.
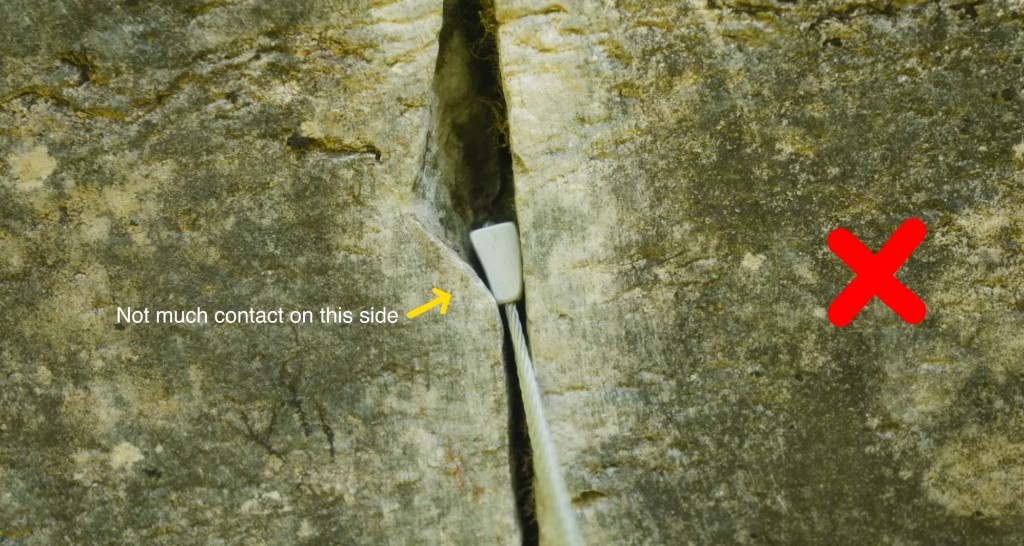
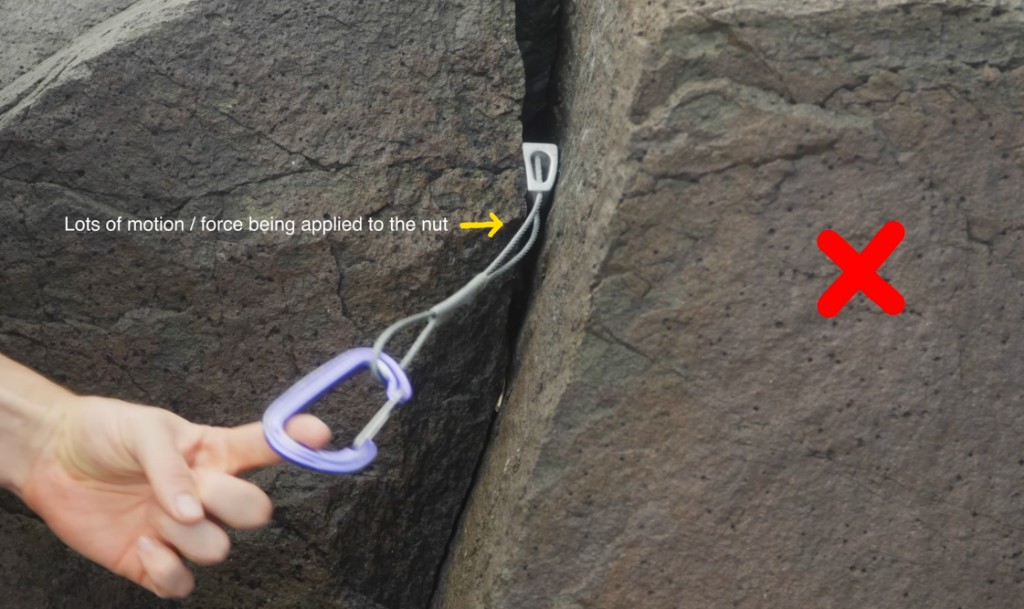
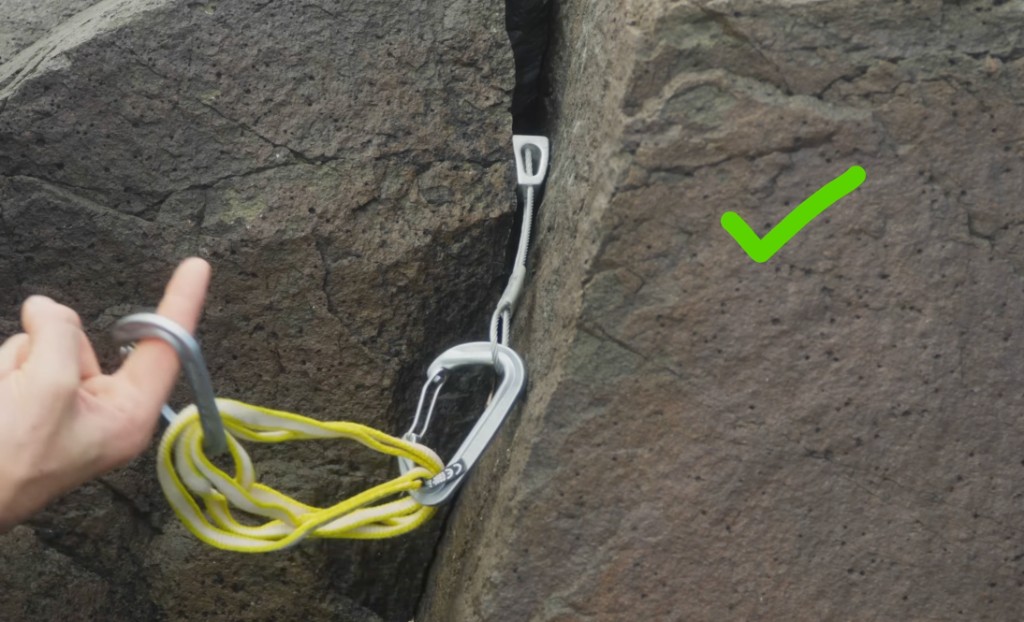
The spot must pinch in the load direction and match the wedge. Parallel cracks → a cam. Wrong shape = the nut skates or holds on one edge.
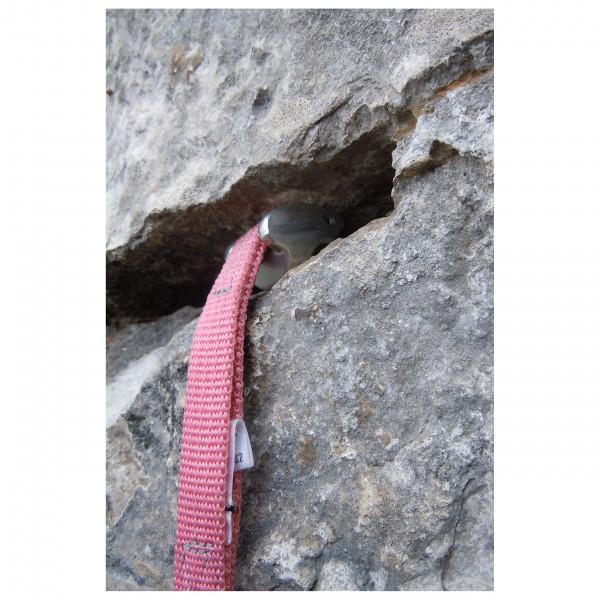
As much face on the rock left and right as you can. Only the bottom edge / one side in contact (see photo) → too big or a bad pick; it can twist out and pop.
That’s why you carry a full set: too big rattles, too small slides through. The right size feels seated before you set it.
After placing, pull firmly in the load direction so the wedge seats. Unset, it walks as soon as you climb over it.
A carabiner alone on the nut is not enough: as you climb on, the rope puts a lot of movement and force on the wedge — it can unseat. Always extend (alpine draw or quickdraw) — the soft sling damps the movement.
The wedge must pinch against the expected load. Sideways pull or “wrong way” in the slot — check the placement before you move on.
Seat nuts in the lower part of the constriction, not on the lip at the top. Up there they often sit on a rim and pop more easily.
One hand on the block, tap with the other. If you feel vibration, it isn’t solid — no sling or cam on it.
If the rope line leaves the vertical (zigzag through gear, corners, overhanging edges), extend with alpine draws. Otherwise rope drag eats you — and nuts can walk from rope movement.
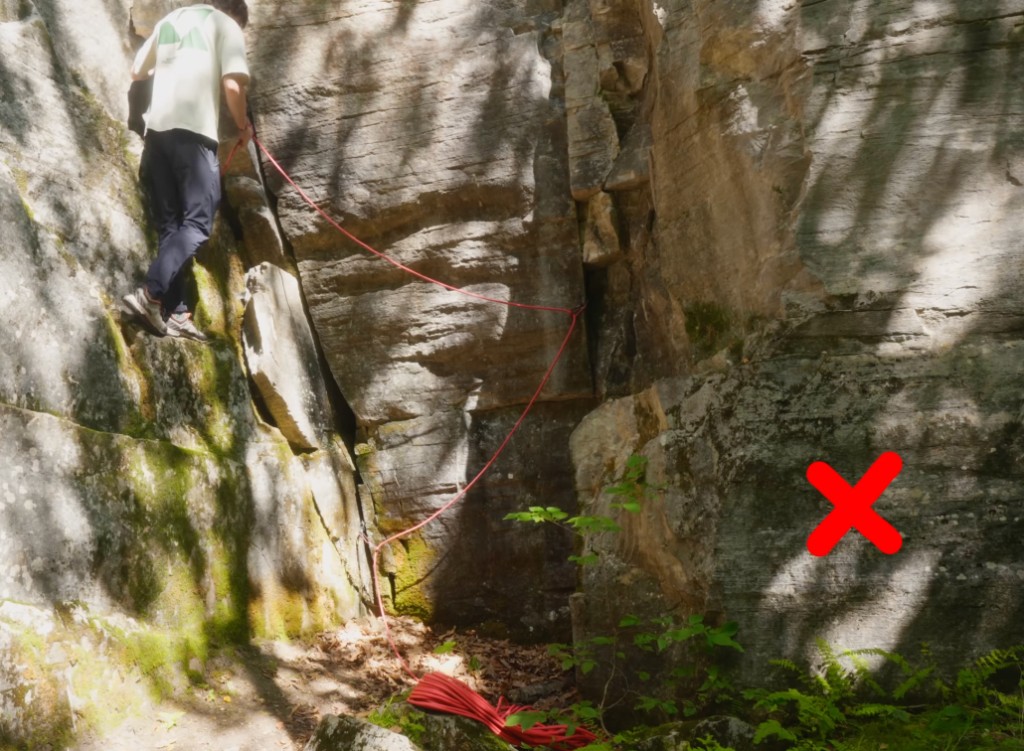
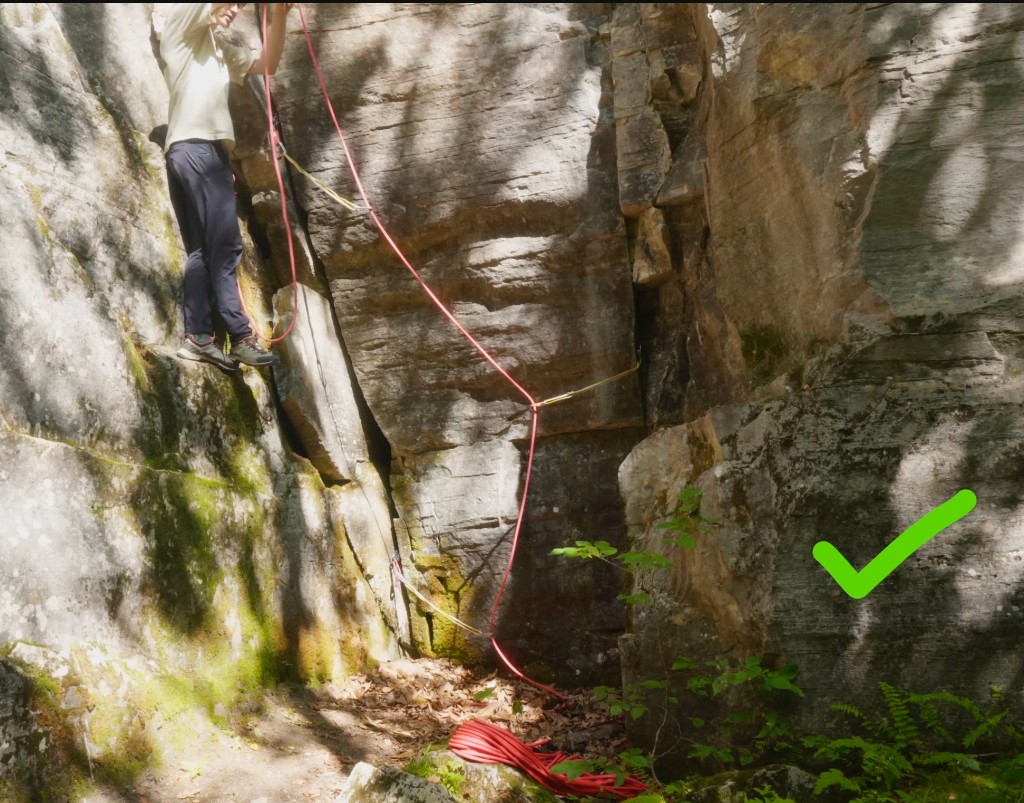
Short sport draws yank the rope hard into every piece. Alpine draws (sling + 2 carabiners) let the line run smoother — less drag, easier clipping higher up.
60 cm sling + 2 carabiners: thread one through the other and clip back. Pull on one of the three strands — the draw extends.
Like sport draws: hold the rope-end carabiner with tape or a clip so it doesn’t flip when you clip pumped.
As a beginner, only well-protected lines (G / no R/X). Better a 5.9 hand crack with lots of gear than a “easy” 5.6 slab with runouts — old grades are often sandbagged.
Don’t skimp in the first metres. Place tight — avoid a ground fall even if the last piece rips.
Before a hard or risky passage (crux, runout, loose) place 2–3 pieces close together. If one rips, the others still hold the fall high enough.
If you can, place a size that still has a twin on the harness. Save the “last” size for the spot where only that one fits.
Stay safe, but don’t place so much that nothing is left for the anchor. Strategy: denser where it’s risky, leaner where it’s calm.
Before you lead: climb the route on top-rope and practise placing (pick size, set, clip). Know the moves and placements — then the lead feels much calmer.
Second, look at placements: why a nut not a cam, why this size, why this crack. Best way to learn — besides practising on the ground.
Learn the cam feel on gneiss, granite, porphyry rather than smooth limestone. Nearby: Battert (easy grades), Murgtal / Ergenfelsen near Gernsbach (two cracks), Brettfels (Pumprisse).
To cheat / rest: knot a sling in the cam and use it as a step. Only where allowed or marked p.a. — and check the cam afterwards; it walks under foot load.
Above the last piece the rope must run on the laces side of the foot — not behind the leg. Otherwise a fall can flip you upside down.
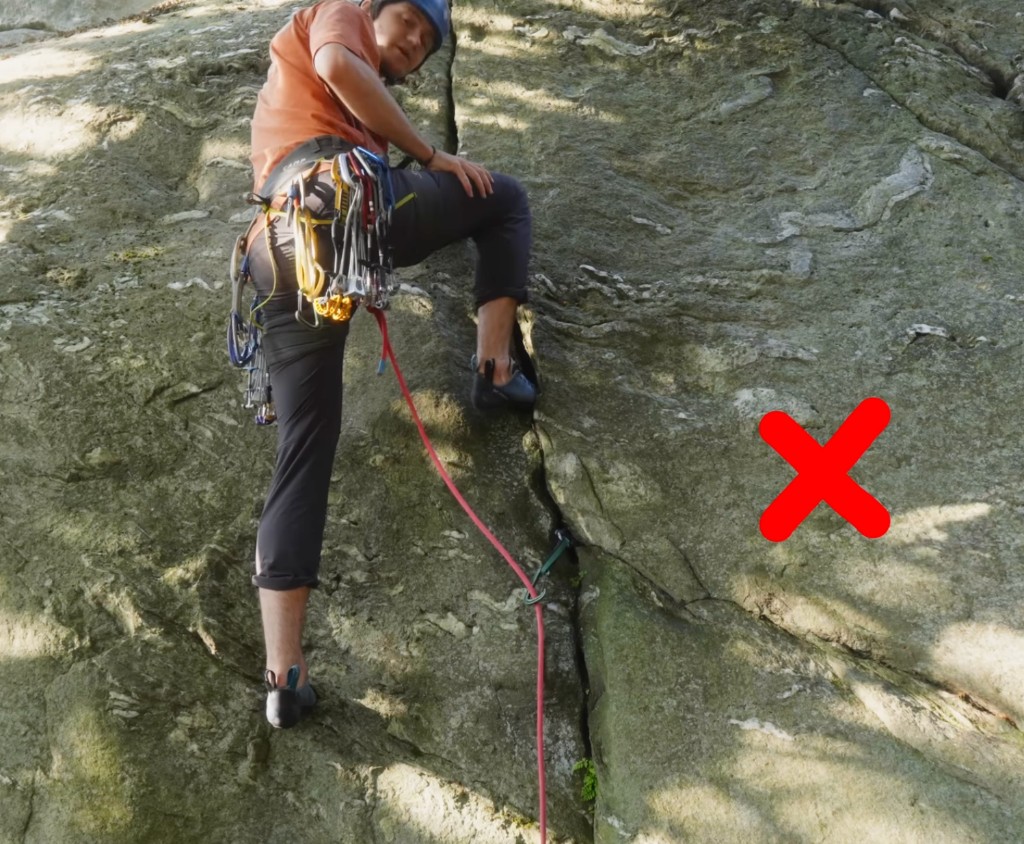
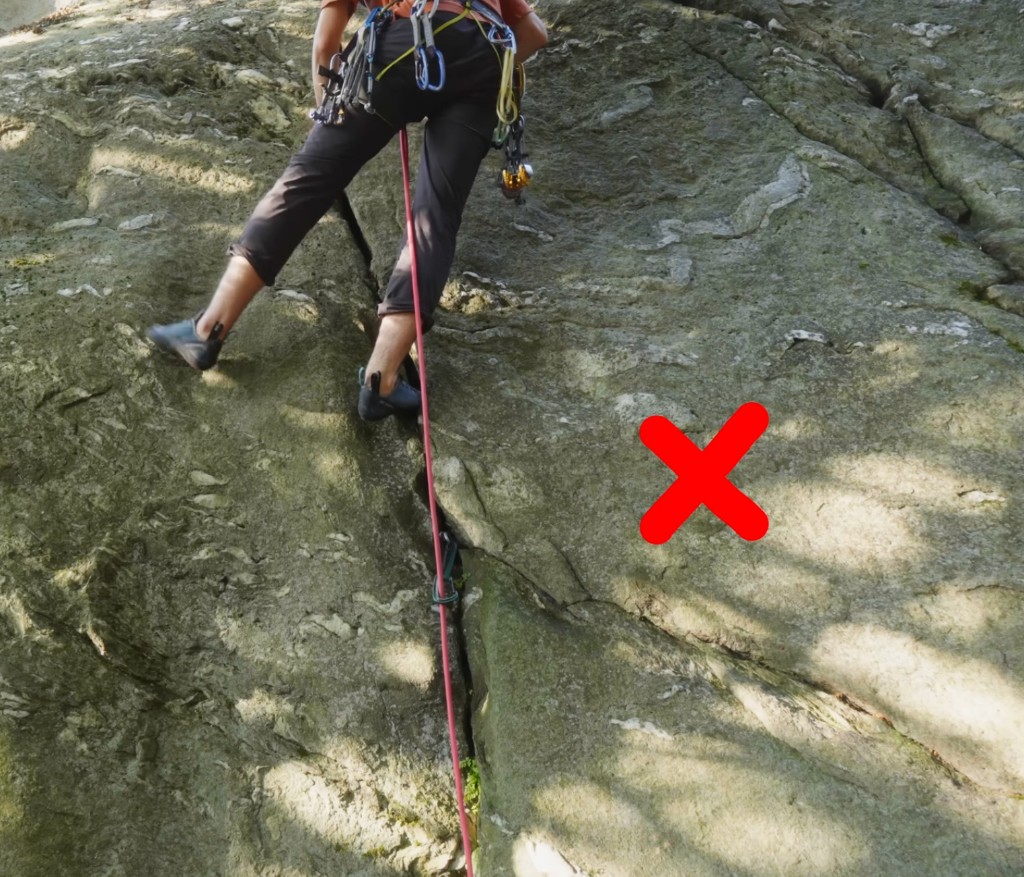
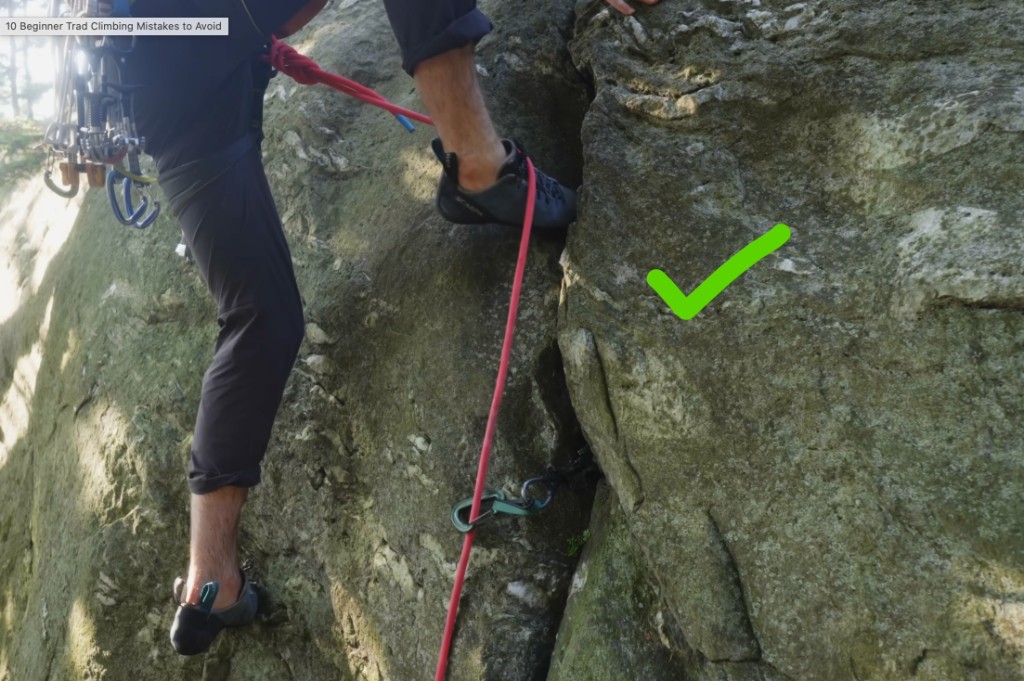
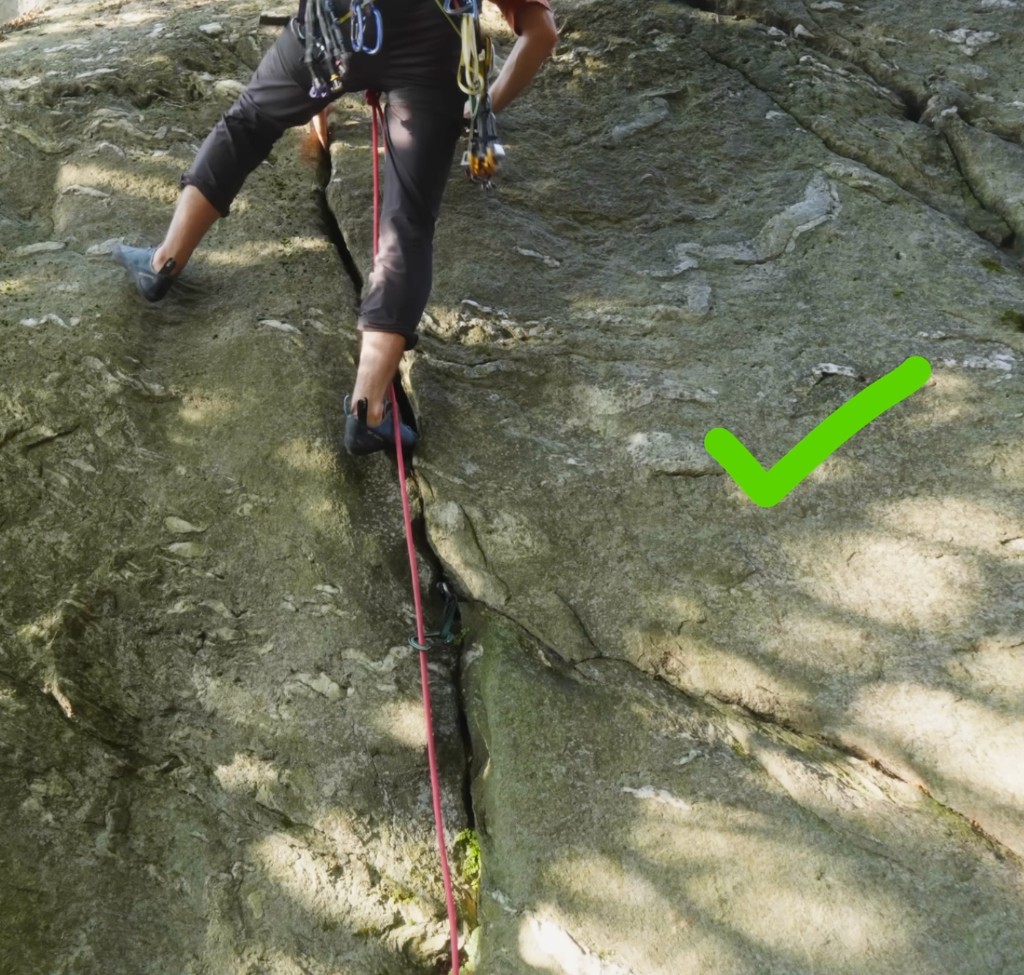
Foot in the crack: rope in front at the laces, not behind the calf. It can look crossed — but it keeps you upright in a fall.
Down low it can still look fine — as soon as you stand, the leg is often suddenly behind the rope (see photos). Check and correct before the next move.
On solid bolts: a DAV series anchor (see belay anchors). In a crack without bomber bolts: often equalise three good cams or nuts — a long sling shares the load across all points.
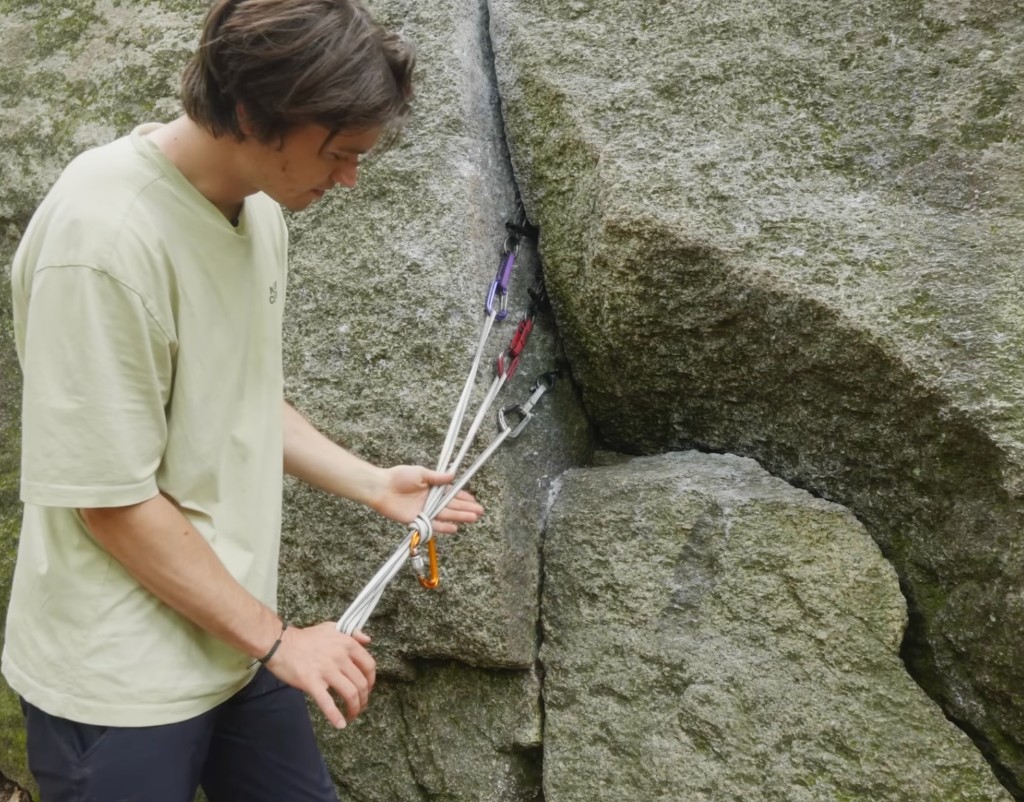
Classic: three solid cams/nuts in the expected load direction. Test each piece — a “nearly good” point doesn’t count.
Clip the sling into all three carabiners, gather the inner strands and equalise in the load direction. Tie an overhand as the master point — all three pieces then share.
Before you cinch the overhand: put a carabiner through the knot. Later the knot is much easier to undo — otherwise it often welds after loading.
No long sling? With the climbing rope: clove hitch outside, master-point knot, clove hitch other side — equalised, plus a tether on the rope.
Alive, thick, healthy. Sling around the trunk, knot so you have redundancy (one side fails → the other still holds).
More on bolted stances under Belay anchors →
Usually a soft catch like sport. On a runout with ground or ledge risk, catch hard and take in slack — a hard catch beats a ground fall.
When rappelling always knot the ends. Practical: one overhand through both ends together (lots of tail) — they stay together when thrown, less “one end stuck up there”.
Fear is normal. If the fear feels like fire and you can’t come down, you may not be ready — better to bail than talk yourself into it.
Experience brings confidence — and the risk of getting sloppy (placing less, leg behind the rope, sloppy belay). Stay careful and humble.
After rain on sandstone often wait 48–72 h. Don’t overcam. Clean shoes against polish. Don’t step on crypto soils. Pack poo out in a bag, don’t bury it.
Fine small stones on the boulders at the base are a clue of rockfall. Helmet on; don’t belay needlessly under loose ground.
The tips on this page summarise the main points from the video — not a substitute for experienced company and practice at the crag.
Video © Noah Kane — watch on YouTube ↗. Not a substitute for instruction and experienced company.
Also the protection and seriousness scales → and the gear recommendations → · why granite cams differently than limestone: Rock types → · Practice crags under Tour planning →
Product photos as examples — not a buying recommendation and no affiliate links. Practise placing with instruction before you rely on it.